Siirry suoraan päänavigointiin Suora pääsy sisältöön Siirry alanavigointi-tilaan

Thickness - Thickness of plate, sheet, foil, rubber, insulation, layer, board

Thickness measurement using displacement sensors is a wide application area. Basically there are distinctions between non-destructive/destructive, non-contact/with contact and one-side/two-sided thickness measurement. The Micro-Epsilon measuring techniques for thickness measurement are all emission-free whereby no emissions regulations of any kind have to be complied with.

Thickness measurements must be performed both with contacting as well as with non-contact sensors whereby non-contact measuring techniques show advantages with regard to accuracy and measuring speed.

There is also a distinction between one-sided and two-sided thickness measurement. Two-sided thickness measurements are carried out with at least one pair of sensors which are installed together on one axis. This pair of sensors measures the target synchronously. The difference between the measurement results (C-A-B) produces the thickness of the measuring object.

One-sided thickness measurements must only be performed with non-contact sensors. In doing so, the target is only measured with one sensor and either only a part of the target thickness (e.g. layer thickness) or the complete measuring object thickness is measured. Thickness measurements are mainly used in process control and quality assurance, e.g. for the control of extrusion systems or 100% checking of tube diameters.

Alumiinin kosketukseton paksuuden mittaus

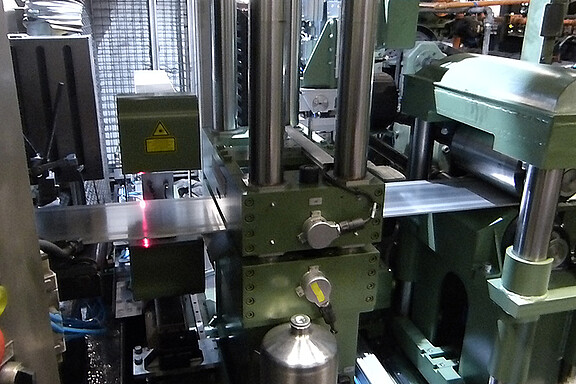
Alumiiniliuskojen virheellisen paksuuden havaitsemiseksi patentoituja laserkolmiomittausantureita käytetään nykyaikaisena vaihtoehtoisena ratkaisuna isotooppimittausjärjestelmille. Kustannusten säästämiseksi alumiininauhassa olevia kohtia, jotka ovat sallitun toleranssin ulkopuolella, ei pinnoiteta elintarvikkeille sopivalla pinnoitteella, joten nauha on täysin kierrätyskelpoinen tuotannossa. Mittauskohdassa anturit on asennettu toisiaan vasten, ohikulkevan alumiininauhan ylä- ja alapuolelle. Nauhan tarkalla korkeudella ei ole merkitystä, koska materiaalin tarkka paksuus saadaan yksinkertaisella etäisyyden signaalikytkennällä, F = ref. − (A + B) molemmista antureista.

non-contact-thickness-measurement-aluminium.jpg

Alumiinin paksuus

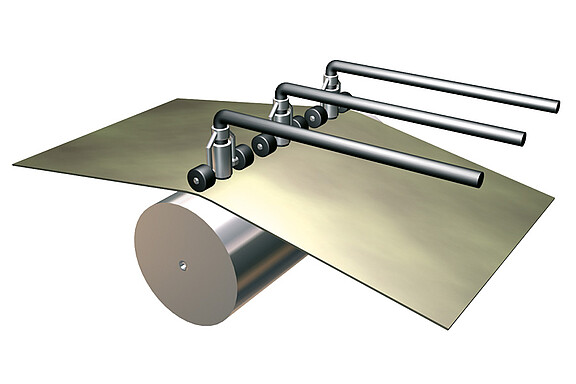
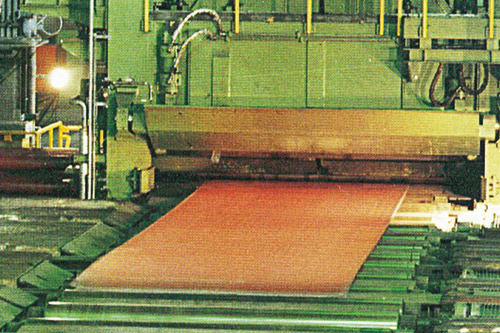
Alumiinilevyjen valmistuksessa on tärkeä tietää levyjen paksuus. Kosketukseton profiilinmittausjärjestelmä mittaa levyjen profiilin kapasitiivisella anturilla. Samaan aikaan levyn leveys määritetään mittauksen aikana. Taaksepäin tuleva valssituoli ja seuraavat tuolit voidaan säätää paremmin saadun tiedon mukaan. Järjestelmä integroidaan käytössä olevaan valssirunkoon. Asennus tehdään juuri ennen rajausleikkausta, kun levy on paikallaan leikkausta varten, jolloin tuotantoprosessi ei keskeydy.

thickness-measurement-aluminium.jpg

Thickness measurement of battery separators

In the production of battery separators the in-line monitoring of the profile thickness is an important measurement task within the framework of quality assurance. A measurement system with high spatial resolution and a high sampling rate is needed for the determination of the profile structure. This task represents one of the classical fields of application for the laser-based triangulation sensor in the Series ILD 2000. The battery separator is manufactured in an extrusion process. For the thickness measurement the optical sensors are mounted on a welded C-frame. This traverses on air bearings without making physical contact on a hard rock base. In this way the vibration of the top belt is minimized and a precise measurement facilitated.

thickness-measurement-battery-separators.jpg

Puhalluskalvon paksuus

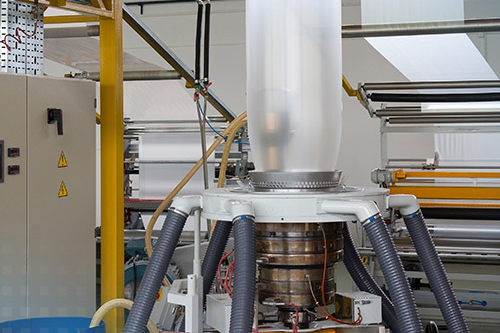
Puhalluskalvon paksuus on puhalluskalvon valmistuksen tasalaatuisuuden kannalta tärkeä tekijä. On mahdollista että tuotannossa esiintyy suuriakin paksuustoleransseja. Micro-Epsilonin puhalluskalvojärjestelmä mittaa kalvon paksuuden kosketuksella tai kosketuksettomasti heti puristimen jälkeen. Järjestelmä sijaitsee paikassa, josta kalvo kulkee jatkuvasti kalvoputken yli tuottaen valmistusjärjestelmälle tietoja puristimen ohjaamiseksi.

thickness-measurement-film.jpg

Sheet thickness

It is often the case for sheet machining that sheets must be transported individually in machines. Therefore, it is essential that only one sheet gets into the machine. If two sheets are on top of each other, the process will be halted. This task is resolved in a simple way using thickness measurement. If the current measured value is different from the thickness of one sheet, an error is detected. The measurement is independent of the absolute position of the sheet in the measuring gap. Depending on the requirement, laser, optical, capacitive or eddy current sensors can be used for this.

dummy-900x600.jpg

Measure Disc Thickness Variation (DTV) on brake discs

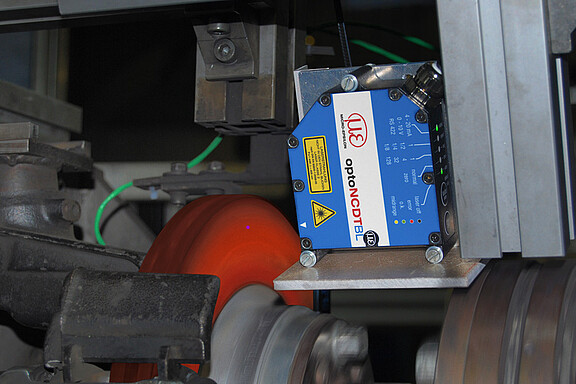
Measuring  the  deformation  of  brake  discs  under  load while braking is an ideal task for the optoNCDT 1700BL. Due to the short wavelength of the blue-violet laser used, the light emitted from the red-hot brake does not dazzle the sensor, as the 600-nm wavelength is a long way off the 405-nm wavelength of the blue-violet laser and is effectively blocked by the high quality interference filters employed.

measurement-disc-thickness-variation.jpg

One-sided thickness measurement of container glass

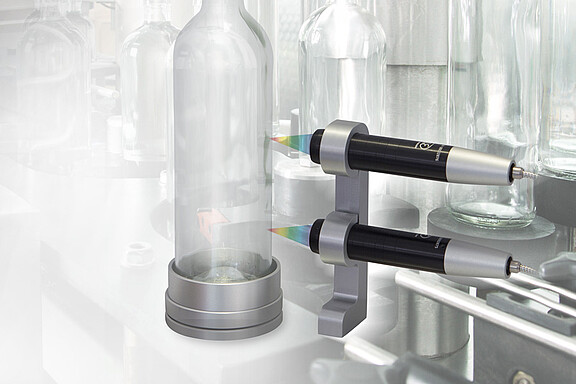
In container glass production, wall thickness and roundness of the bottles are crucial quality features. This is why these parameters must be 100 % inspected. Any faulty containers are immediately rejected and returned to the glass melt. Due to high processing speeds and in order to prevent the bottles from being damaged, a fast, non-contact measurement procedure is required. The confocal chromatic confocalDT 2422 dual-channel measurement system combined with the IFS2406-10 sensor from Micro-Epsilon are ideally suited to this measurement task.

measurement-container-glass.jpg

Thickness measurement of mineral cotton

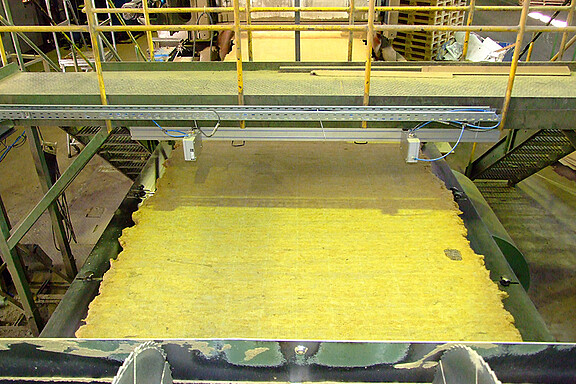
Mineral cotton is often used for heating insulation of buildings.  However,  as  well  as  the  homogenous  material structure, thickness is also a critical factor in ensuring the right insulation characteristics. In the production two  optoNCDT  1700  laser  sensors  with  an  integrated controller and air purge system for protecting the optics are therefore required for quality control.

thickness-measurement-mineral-cotton.jpg

Mustien kumihihnojen paksuusmittaus

Rakenteen tiivistämiseen tarkoitetujen kumimattojen on kestävyyden ja repäisylujuuden vuoksi oltava tietyn paksuisia. Kalvojen paksuus mitataan suoraan ekstruusion jälkeen. Käytetyt optoNCDT 1750 -anturit mittaavat etäisyyden kumiin huonosta heijastavuudesta huolimatta. Paksuus määritetään anturisignaalista ja etäisyydestä vertailuvalsseihin. Näin käyttäjä tunnistaa jo vähäisetkin poikkeamat kohdepaksuudesta.

thickness-measurement-black-rubber-belts.jpg

Kelojen halkaisijan mittaaminen

Micro-Epsilonin optoNCDT ILR2250-100 -laseretäisyysanturit mittaavat keloja vaihevertailumenetelmän perusteella. Tätä mittaustehtävää varten anturi asennetaan 0,2–10 metrin päähän kelan sädettä kohti. Se mittaa jatkuvasti etäisyyttä käämiin. Kun teräsnauhakelan halkaisija pienenee teräsnauhan kelautuessa pois, kelan ja anturin välinen etäisyys kasvaa jatkuvasti. Anturi tunnistaa luotettavasti tämän etäisyyden muutoksen ja välittää sen mittausarvona RS422-sarjaliitännän kautta tuotantoprosessin ohjausjärjestelmälle. Ohjausjärjestelmän kautta voidaan nyt antaa varoitusviesti hyvissä ajoin jo ennen kuin materiaali on kokonaan poistettu kelalta.

diameter-measurement-coil.jpg

Thickness and volume measurement of potato slices

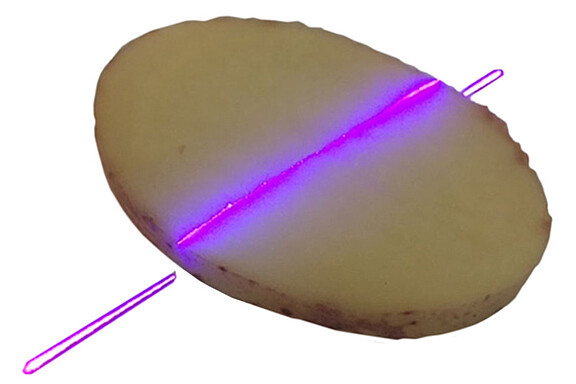
When producing potato crisps, factors such as consistency, quality and taste depend to a significant degree on the thickness of the potato slices used. Depending on the process parameters and the condition of the tools used, the thickness of the cut slices changes slowly but steadily during the production time. This is why it is important to continuously monitor the thickness during production by using the scanCONTROL 2950-50BL sensor. The sensor projects a laser line onto a conveyor belt, which continuously guides sample slices along it.

volume-control-potato-slice.jpg

Display glass / flat glass thickness

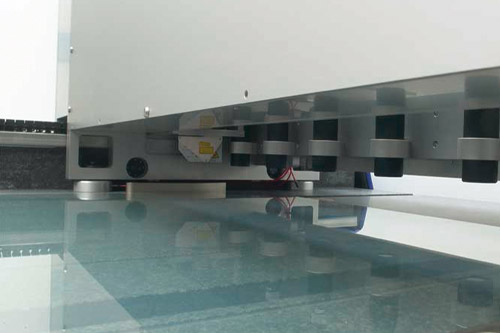
A special measuring system has been developed for the quality control of display glass. The glass pane is placed on a measuring table by a robot. A measuring arm with several confocal sensors traverses the glass pane there. If any thickness discrepancies are found, the pane is marked as NOK and rejected. The scanCONTROL laser scanner simultaneously circumnavigates the edges and checks these for defects and dimensions. After the check has been completed successfully, the pane is lifted back into the production process and the next measurement is started.

thickness-measurement-display-glass.jpg

Flat film thickness

The thickness of manufactured films is frequently a decisive quality criteria in production. Specially developed thickness measurement systems are used as early as possible in the production for the check of the thickness. Dual sensors consisting of two sensors with different measuring principles measure the thickness across the complete width of the film from one side without contact. A thickness profile of the flat film is thus produced using which the production systems can be regulated extremely precisely. The dual sensors are compiled differently depending on the type of film.

thickness-measurement-film.jpg

Kosketuksetonta kalvon paksuuden mittausta

Kalvojen valmistuksessa inline-paksuusmittaukset takaavat tuotteen tasaisen laadun. Micro-Epsilonin KS5-yhdistelmäanturi mittaa kalvojen paksuuden kosketuksettomasti ja kulumattomasti.

non-contact-film-thickness-measurement.jpg

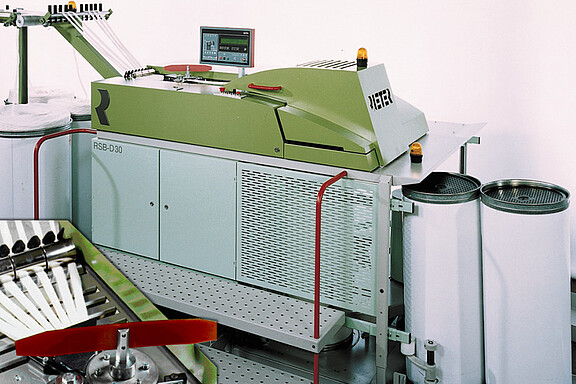
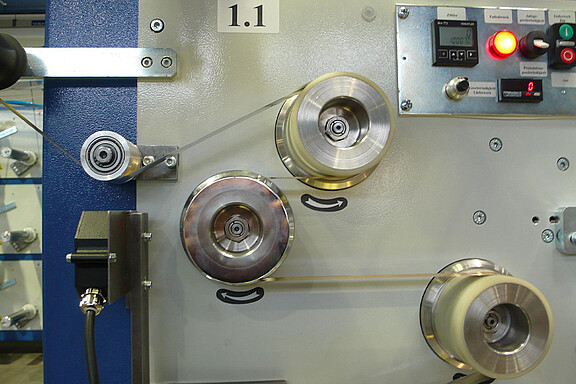
Langan vahvuus

Tekstiiliteollisuudessa yhdenmukainen langan vahvuus on olennaista laadukkaiden tuotteiden valmistuksessa. Siksi luonnollisesti esiintyvät langan vahvuuden vaihtelut on saatava poistettua. Lanka vedetään tasavahvaksi venytystyökalulla. Mittaustiedot venytystyökalun ohjaamiseen saadaan pyörrevirta-anturilla, joka mittaa langan vahvuutta epäsuorasti. Vahvuus lähetetään pyörrevirta-anturille anturitelojen avulla. Venyttämisen jälkeen prosessointitoiminnan tulos tarkistetaan myös pyörrevirta-anturilla.

yarn-thickness.jpg

Glass thickness

A special measuring system has been developed for the quality control of glass. The glass pane is placed on a measuring table by a robot. A measuring arm with several confocal sensors traverses the glass pane there. If any thickness discrepancies are found, the pane is marked as NOK and rejected. The scanCONTROL laser scanner simultaneously circumnavigates the edges and checks these for defects and dimensions. After the check has been completed successfully, the pane is lifted back into the production process and the next measurement is started.

glass-thickness.jpg

Thickness measurement of glass

The specification of the thickness of glass panes is an optimization process between a required mechanical strength and efficient use of materials. In the manufacturing process the glass thickness is measured and the conformance to prescribed tolerances is monitored. The measurement is carried out with displacement sensors working on the eddy-current principle. Here, the sensor hovers over the glass surface and measures through the glass to a metal plate situated behind it. The values can be read off directly on the device; an analog output voltage facilitates further evaluation.

thickness-measurement-glass.jpg

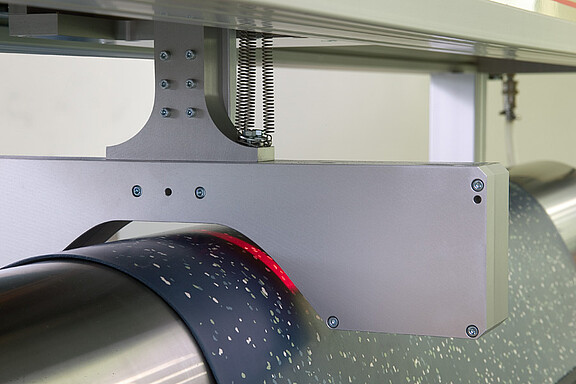
Inner liner thickness measurement

Inner liners are used in every tyre to prevent the air from escaping. As the inner liner is a characteristic relevant to safety of every tyre, there are high requirements for compliance with the target data. An important criterion is the layer thickness. The system for measuring the thickness of inner liners operates without contact and wear-free. The inner liner is routed through the measuring system immediately after the calender roller. A measuring head traverses above the surface. An eddy current sensor measures the distance to the reference roller while an optical micrometer measures the distance to the rubber surface. The system can be integrated in the heating circuit of the calender roller for better temperature compensation.

inner-liner-thickness-measurement.jpg

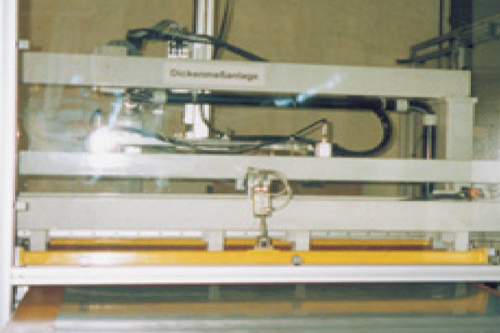
Thickness measurement system for partially transparent insulation panels

In the manufacturing of plastic panels, thickness profile measurements must be carried out due to the necessary quality assurance. For this purpose two laseroptical displacement sensors are mounted on a traversing device, one underneath and one above the panel which passes along a defined path. The preprogrammed measuring points are sampled consecutively. Irrespective of the exact height position of the panels, the accurate material thickness is obtained by simple coupling of the synchronously measured distance values from both sensors. The output of the desired measurement log is realized with the aid of a PC system in the fully automatic sequence of the profile measurement table.

measurement-system-insulation-panels.jpg

Aktiivinen liikkeen kompensaatio mittausprosessissa

Ankarat teollisuusympäristöt asettavat suuria vaatimuksia optisille siirtymäantureille - tarkat mittaukset on kuitenkin tehtävä pölystä ja suurista käsittelynopeuksista huolimatta. OptoNCDT 1750- ja optoNCDT 2300 -sarjan laseranturit ovat selvinneet näistä haasteista jo vuosia. Jos kuitenkin esiintyy häiriöliikkeitä (esim. hihnan liikkeet, hihnapyörän säteittäiset liikkeet ja perusrungon värähtelyt), jotka ovat suurempia kuin mitattava kohde, mittausprosessi voi estyä tai muodostua mahdottomaksi. Esimerkkejä ovat taitekohdat hihnassa.

compensation-movements-measurement-process.jpg

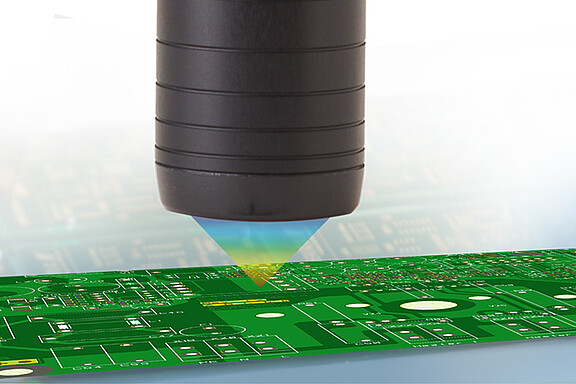
Piirilevyjen lakan paksuuden mittaaminen.

Piirilevyt on päällystetty suojaavalla kirkaslakalla niiden suojelemiseksi ympäristön vaikutuksilta kuten kosteudelta. Näin varmistetaan virheetön toiminta. Erityisesti autoteollisuudessa tältä suojapinnoitteelta vaaditaan tietty minimipaksuus.

Aikaisemmin mittaaminen ei onnistunut ilman, että kohde rikkoutui. Micro-Epsilonin konfokaaliset anturit ratkaisevat tämän mittaustehtävän koskettamatta kohteeseen, jolloin mittaus tapahtuu ainetta rikkomatta. Ne tarjoavat reaaliaikaiset paksuusarvot.

Käytössä ovat konfokaaliset confocalDT IFS 2405 -anturit, joiden mittausetäisyys on 1 mm. Näiden antureiden tunnusomainen piirre on erittäin pieni vain 8 µm:n mittauspiste sekä erinomainen tarkkuus ohuiden kerrosten mittaamisessa.

thickness-measurement-varnish-pcb.jpg

Thickness measurement of dies

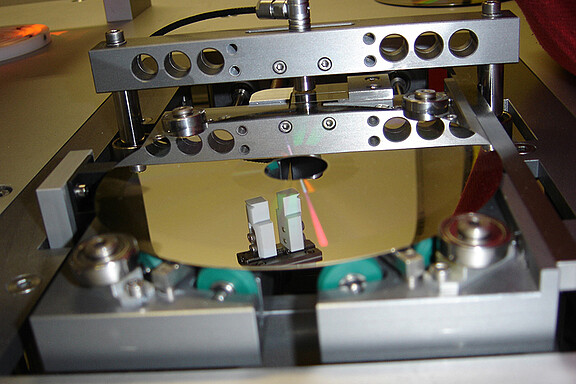
When optical data carriers are produced, the data are initially transferred to a master. Depending on the number of copies, different dies made of nickel are produced from the master by galvanisation. These dies must show a thickness of 297 µm ± 3 µm for faultless production. It is checked several times during the galvanisation that this dimension is complied with. The company ISEDD GmbH from Bielefeld has developed a measuring device for this which enables fast and accurate inspections of the dies. Capacitive sensors from Micro-Epsilon are used for the thickness measurement.

thickness-measurement-dies.jpg

Paksuuden mittausta kapasitiivisia antureita käyttäen

Kapasitiivisilla antureilla tehtävä paksuuden mittaus on laaja sovellusala. Paksuuden mittauksessa erotetaan toisistaan tuhoamaton ja tuhoava, kosketukseton ja kosketuksellinen sekä yksi- ja kaksipuolinen mittaustapa. Micro-Epsilonin käyttämät paksuuden mittausmenetelmät ovat päästövapaita, joten mitään päästörajoituksia ei tarvitse huomioida. Paksuuden mittauksia on tehtävä sekä kosketusta käyttävillä että kosketuksettomilla antureilla, sillä kosketuksettomilla mittaustekniikoilla on etuja tarkkuuden ja mittausnopeuden suhteen. Mittauksissa erotetaan myös yhdeltä ja kahdelta puolelta tehdyt mittaukset. Kaksipuoliset paksuuden mittaukset tehdään vähintään yhdellä anturiparilla, jotka on asennettu yhdessä samalle akselille. Tämä anturipari mittaa kohteen synkronoidusti. Mittaustulosten (C-A-B) erot tuottavat mitattavan kohteen paksuuden. Paksuuden mittaus yhdestä suunnasta on tehtävä vain kosketuksettomilla antureilla. Tällöin kohde mitataan vain yhdellä anturilla ja mittauksen kohteena on joko vain osa kohteen paksuudesta (esim. kerroksen paksuus) tai kohteen koko paksuus. Paksuuden mittausta käytetään etupäässä prosessin ohjauksessa ja laadunvarmistuksessa esim. ekstruusiojärjestelmissä tai putkien halkaisijoiden tarkistuksessa.

dummy-900x600.jpg

Thickness measurement of rubber film

Precise thickness specifications are assigned for the manufacture of rubber film which is rolled using calender rollers. Random-sample manual measurements, as previously carried out, are no longer sufficient for today’s demands on quality assurance. Consequently, a system with three fixed tracks has been adapted for in-line inspection of the thickness. For each track an eddy current sensor of Type U6 is built into a jockey follower system which measures against an stainless steel roller. Controllers of the range multiNCDT series 100 are employed for the evaluation electronics. The stainless steel roller represents the reference system for the measurement.

thickness-measurement-rubber-film.jpg

Oil film thickness

The oil film thickness for combustion engines describes the gap and thus the quantity of oil between piston and cylinder wall. Thus it is sometimes a determining factor for smooth operation and durability. As the oil film can only be integrated and really measured in the firing condition, it is extremely difficult to manufacture sensors for these environmental conditions and then also find space for them. Specially miniaturised eddy current sensors from Micro-Epsilon are capable for this. The smallest with only 2.4 mm external diameter is integrated directly into the cylinder wall and ground to its shape. There, it measures the distance from sensor to piston or the space available for the engine oil for lubrication in every stroke.

thickness-measurement-oil-film.jpg

Double-sheet detection before pressing

To prevent damage, laser-based optical displacement sensors are employed in front of the inlet for profiled sheets in presses to enable the detection of double sheets. The sensors are mounted opposite one another, above and below the passing sheets. Irrespective of the actual position of the sheets, the material thickness is obtained by

simple coupling of the distance signals from both sensors. For adjustment a master sheet for each type of sheet is inserted into the measuring gap and the resulting signal set to zero. The zero value is monitored within a tolerance. The sensors are operated in special protective housings because of the harsh ambient.

double-sheet-detection-before-pressing.jpg

Thickness monitoring in straightening factories

Optical laser displacement sensors are employed in front of the inlet for panels on straightening machines to prevent damage to the machine. The sensors enable the detection of double sheets and an accurate acquisition of upright edges.

thickness-monitoring-straightening-factories.jpg

Layer thickness measurement (non contacting)

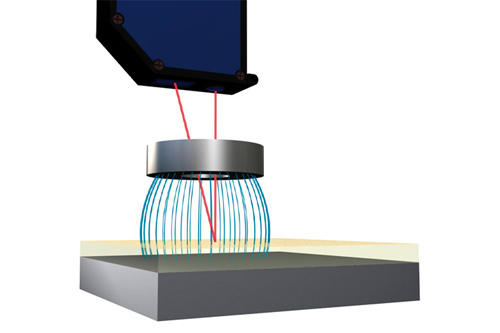
Layer thickness measurement belongs to the group of one-sided, non-contact thickness measurement. Basically, only the layer thickness of electrical insulators can be measured for opaque objects. An eddy current sensor penetrates the insulating layer without damage and measures the distance to a layer underneath it. At the same time, a second sensor, a laser triangulator measures the insulating layer. The layer thickness is obtained by offsetting both signals. This method of measuring with two sensors using different principles is called the dual sensor technique by Micro-Epsilon.

A second possibility is the layer thickness measurement of transparent materials using confocal measurement technology. The emitted white light penetrates the measuring object and provides a peak in the signal graph at every material transition. For example, the film thickness between two glass panes can be easily measured in this way.

non-contact-thickness-measurement-layer.jpg

Measurement of flat washers

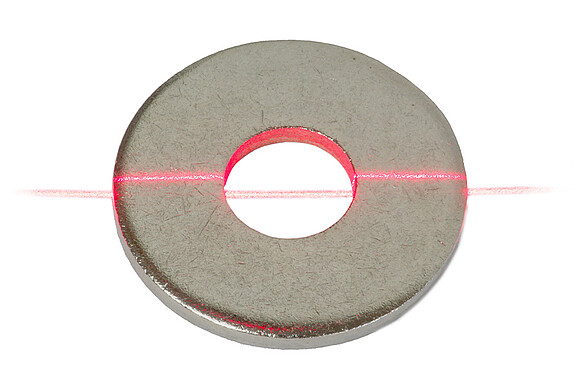
These days, flat washers are an auxiliary material used in almost every industry. In most cases, the washers consist of different alloys and are required in all sizes and thicknesses, which means the demands on the manufacturers are particularly high. In order to supply the customer with a correctly sorted, high quality product, the thickness and diameter are inspected before the washers are packed. This inspection is carried out using a scanCONTROL 2910-50 laser scanner.

measurement-flat-washers.jpg

Windscreen thickness

Using a film between several glass panes, laminated safety glass prevents dangerous shards flying around in the case of breakage. The adhesive film is clamped during the production. In doing so, it is important that the film shows the correct thickness in order to be able to ensure the required safety. Thickness can be measured on one side using the confocalDT confocal system. The light from the sensor penetrates the glass and displays the thickness of the film in the pane.

thickness-measurement-windscreen.jpg